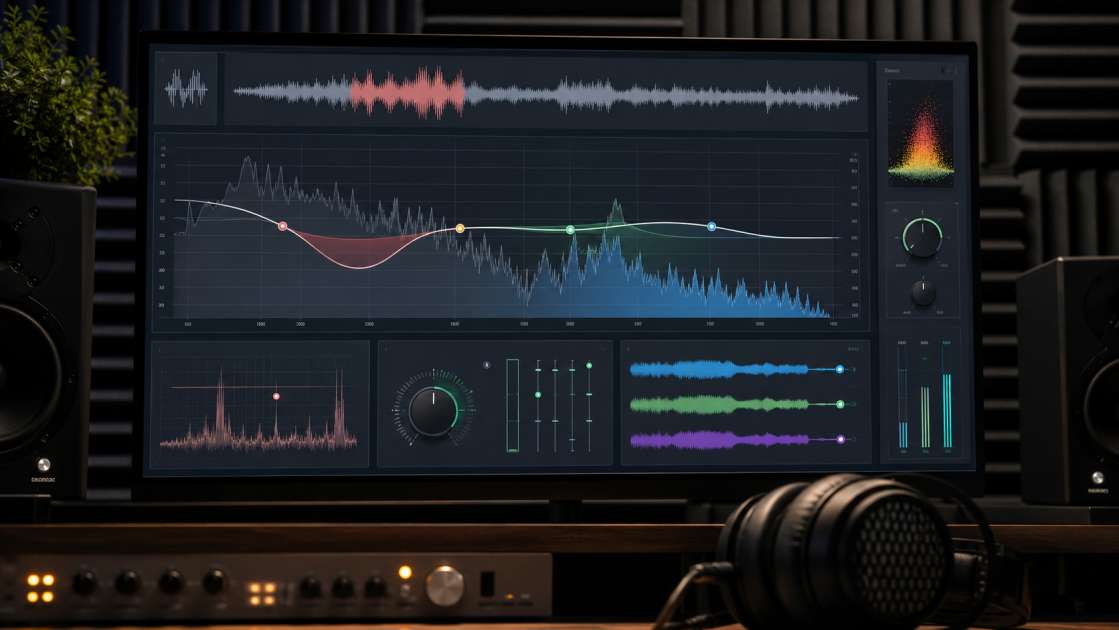
Suno spits out a full track in thirty seconds flat. The melody hooks, the structure holds together, the vocals actually sound like words. Then you press play on Spotify next to it and reality hits: your track sounds like someone wrapped it in a blanket and shoved it in a cardboard box. The composition is there, the arrangement works, but the audio itself feels wrong in a way you can't quite name until you learn the words for it.
In short: Cut around 400 Hz to kill the mud, slice 6-8 kHz to tame harshness, mono your bass below 80 Hz to fix that synthetic feeling. Bring a decent pair of headphones for checking your edits. Budget an afternoon if you're doing this manually, or ten minutes if you're using AI restoration tools. Main advice: always A/B compare your processed version against the raw export at the same volume, because louder always sounds better even when it isn't.
Understanding the Core Problems in Suno Audio
Three villains haunt every raw Suno export, and they have names. First is mud — that muffled, congested thickness that lives between 200 and 500 Hz where your bass, synths, and the bottom half of your vocals all decide to have a fistfight for the same frequency space. Press your ear close and you'll hear it: instruments stepping on each other, nothing clear, everything competing. It's the acoustic equivalent of five people talking over each other in a small room.
Then comes harshness. That piercing, fatiguing edge in the highs, usually camping out around 6 to 12 kHz. Some call it digital fizz. Others call it sibilance when it's specifically those sharp S sounds that feel like someone's dragging a fork across your eardrums. Listen to a Suno vocal on headphones for more than two minutes and you'll know exactly what I mean — your ears start to tire, you want to turn it down, but the problem isn't volume, it's frequency.
The third problem doesn't have a catchy name in the manuals, but everyone who works with AI audio recognizes it immediately: synthetic edges. That plastic, robotic quality. The metallic sheen. Part of it is stereo phase smear in the bass making everything feel artificially wide and unfocused. Part of it is digital artifacts scattered across the entire track like someone sprinkled robotic dust on your mix. It doesn't sound like music recorded in a room. It sounds like music rendered in a computer, which of course it is, but it shouldn't announce that fact every three seconds.
And here's what nobody mentions in the cheerful tutorials: Suno has a frequency ceiling. Look at the spectrogram and you'll see the audio just stops around 15 or 16 kHz, like someone drew a line and said "nothing above here matters." Except it does matter, because that missing air is why your track sounds flat compared to anything professional. Add to that the heavy dynamic range compression baked into every generation — your verse and chorus sit at basically the same energy level, which kills the emotional arc — and you've got a laundry list of consistent, predictable problems that show up whether you're generating lo-fi beats or stadium rock.
How to Fix 'Mud': Cleaning Up the Low-Mid Frequencies
I spent an hour on my first Suno track trying to figure out why everything sounded like it was playing from behind a closed door. Turned out the entire 300 to 500 Hz range was a traffic jam. Every instrument thought it owned that space. The fix is simple enough that I felt stupid for not trying it first: grab an EQ, make a bell cut right around 400 Hz, pull it down 3 to 5 dB, and suddenly the track opens up like someone cracked a window.
That's your primary move. Target 400 Hz, cut it, don't boost anything to compensate. The boomy cardboard-box sound just evaporates. You can sweep the frequency a bit — some tracks respond better to a cut at 350, others at 450 — but 400 is the reliable starting point. Use a moderate Q setting, not too narrow or you'll create a weird notch, not too wide or you'll suck the warmth out of everything.
Second move: high-pass filter, also called a low cut. This removes the subsonic garbage you can't hear but that eats up your headroom like a tax. Set it at 35 Hz if you want to be conservative and just kill the true rumble. Set it at 90 Hz on anything that doesn't need bass — vocals, guitars, pads — and you're cleaning up space without losing anything musical. I've seen people get precious about this, worried they're killing the "body" of their track. You're not. You're killing room tone and allowing the actual bass to punch through.
Here's the alternative approach if you want punch instead of just clarity: cut that 400 Hz mud like I said, but then gently boost the 100 to 250 Hz range on your bass and drums. This adds warmth back in a controlled way, in a frequency range that doesn't fight with everything else. Works great for hip-hop or electronic stuff where the low end carries the track. Doesn't work if your mix is already crowded down there, so use your ears, not just the numbers.
How to Fix 'Harshness': Taming Sibilance and Digital Fizz
My first instinct with harsh audio is always to boost something else to balance it out. Wrong. The harshness isn't a gap in the frequency spectrum that needs filling. It's an excess that needs cutting. And it lives in two specific places: 6 kHz and 8 kHz. Cut 6 kHz by 2 to 3 dB and you're targeting that digital fizz — the synthetic edge that sounds like bad DSP processing because that's exactly what it is. Cut 8 kHz by the same amount and you're softening the overall sharp character, making sibilance less aggressive.
But sibilance — those S, T, and Sh sounds in vocals that cut through the mix like a whistle — needs its own tool. Enter the de-esser, which is just a specialized compressor that only reacts to those specific harsh frequencies. You're not cutting them entirely, you're just pulling them down when they spike. Set it to target the 6 to 10 kHz range, adjust the threshold until those Ss stop making you wince, and move on. It's one of those tools that you don't appreciate until you need it, and then you wonder how you ever mixed without it.
For really aggressive digital hash — that high-frequency hiss that sounds like white noise got baked into your track — you can use a high-shelf cut starting at 14 or 16 kHz and just roll everything off above that. Some people call this a de-hiss filter. I call it admitting defeat and cutting off the part of the spectrum that's doing more harm than good. It works, especially on Suno tracks where there's often nothing musical happening up there anyway, just artifacts.
The narrow search technique: boost a very narrow EQ band by 10 or 12 dB and sweep it slowly across the 4 to 8 kHz range while the track plays. When it sounds truly awful, like nails on a chalkboard, you've found your problem frequency. Note that number, flatten the boost, and cut that exact spot by 2 to 4 dB. It's surgical, it's effective, and it teaches you more about your track's specific issues than any generic preset ever will.
How to Fix 'Synthetic Edges': Removing the Metallic Sound
The metallic, robotic quality in Suno tracks has a technical cause, and once you know it, you can fix it. It's called stereo phase smear, and it happens when low frequencies — which should be centered and punchy — get spread wide across the stereo field. Your bass ends up sounding like it's coming from everywhere and nowhere, which translates to unfocused, synthetic, weird. The fix is brutally simple: mono your bass. Everything below 80 Hz should be dead center. Use a utility plugin, set it to make those frequencies mono, and watch your bass suddenly have weight and presence again.
The other half of that synthetic texture comes from the overall frequency content — the stuff we already addressed with de-hiss filters and de-essing. Cutting above 16 kHz kills a lot of the metallic sheen because that's where the worst digital artifacts live. De-essing tames the robotic vocal quality. These aren't separate problems, they're all parts of the same synthetic signature, and you chip away at them one cut at a time until what's left sounds organic.
But if you want to go deeper, you need software that's actually designed for this problem. Adobe Podcast Enhance, for example, was built to clean up spoken-word recordings, but it works surprisingly well on isolated vocal stems from Suno. Export just the vocal, run it through Podcast Enhance with the slider set around fifty percent — not all the way, or it sounds processed in a different way — and you'll get a drier, cleaner vocal that doesn't carry that AI reverb haze.
There's also the Adobe Audition UnSuno preset, which is a community-developed preset specifically for Adaptive Noise Reduction that targets Suno's background ambiance and artifacts. The process: load your vocal stem, go to Effect, then Noise Reduction slash Restoration, then Adaptive Noise Reduction, select the UnSuno preset, set the Reduction Amount somewhere between fifty and seventy percent, and apply. It strips out the synthetic room tone and leaves you with something much closer to a real vocal take. Not perfect, but measurably better.
Advanced Workflow: AI Stem Splitting and Restoration
If manual EQ feels like trying to fix a broken engine with a screwdriver when you need an entire garage, there are AI platforms designed specifically for reconstructing damaged or low-quality audio. Neural Analog and Undetectr are the two I see people actually using instead of just talking about. The workflow is different: instead of cutting and boosting frequencies on the full mix, you split the track into stems — isolated tracks for vocals, drums, bass, other — and process each one individually.
Stem splitting itself is worth the price of admission. Once you have a clean vocal stem, you can run it through a Remove Reverb model or a Singing Upscaler without touching the rest of the track. Your drums can get processed separately to tame harsh cymbals without dulling the guitars. Your bass can be thickened or cleaned without muddying the mids. It's precision work, and it's only possible because AI stem separation has gotten shockingly good in the past two years.
The AI upscaling step is where things get interesting. Models like MP3 Music Restoration were trained on high-quality audio that was deliberately degraded, then the AI learned to reconstruct what was missing. When you run a muffled Suno track through one of these, it's not just applying EQ — it's actually regenerating missing high-frequency content above that 12 to 16 kHz ceiling, adding back the air that should have been there in the first place. It's not magic. It's educated guessing based on patterns in the low and mid frequencies. But it works more often than it doesn't.
Match EQ is another tool that lives in this space. It analyzes a professional reference track's frequency profile and reshapes your Suno mix to match it. Pick a commercial track in your genre, feed it to the Match EQ algorithm, and the tool builds a custom EQ curve to make your track sit in the same tonal neighborhood. It's fast, it's effective, and it saves you from spending three hours tweaking a parametric EQ by hand trying to figure out why your track doesn't sound as warm as the one you're referencing.
Multiband compression comes in at the end. This splits your track into frequency bands — lows, mids, highs — and compresses each one independently. The result is a more controlled, polished sound where the bass doesn't stomp on the vocals and the highs don't turn into a brittle mess. Most platforms offer presets like Broadcast or Pop Master that work well as starting points. I usually dial them back a bit because presets tend to be too aggressive, but they're faster than building a multiband chain from scratch.
Your Essential Suno EQ Cleaning Checklist
| Problem | Action | Frequency (Hz) | Setting (dB) |
| Mud | Bell Cut | ~400 (300–500) | -3 to -5 |
| Room Tone | Low Cut (HPF) | < 90 | Full removal |
| Harshness | Cut | 6 kHz | -2 to -3 |
| Harshness | Cut | 8 kHz | -2 to -3 |
| Digital Hash | Shelf Cut | > 14-16 kHz | Full removal |
| Sibilance | De-Essing | 6-10 kHz | Threshold-based |
| Synthetic Bass | Mono Utility | < 80 Hz | Convert to Mono |
Finalizing and Mastering for Streaming Platforms
Here's where people screw up: they process their track, it sounds better in the studio, they export and upload, and three months later they're asking why it sounds thin on phone speakers or harsh in the car. The reality check matters. Play your final mix on studio monitors, then on cheap earbuds, then on a phone speaker sitting on a desk, then in a car if you have one. The track should hold up everywhere. If it only sounds good in one environment, you've optimized for the wrong thing.
There's also the loudness illusion. Any change that makes a track louder makes it sound better in the moment, even if the actual frequency balance got worse. Your brain interprets louder as better. The fix: when you A/B your processed version against the raw export, match their levels first. Turn the louder one down until they're hitting the same peak or RMS level, then compare. Now you're hearing the actual difference in tone and clarity, not just volume.
Streaming platforms normalize loudness automatically, which means if you master your track too loud, they just turn it down. The target is -14 LUFS integrated loudness for Spotify and YouTube. That's not a suggestion, that's where their algorithms put everything. Go louder and you're just making your track sound more compressed for no benefit. Set your true peak ceiling at -1 dBTP to leave headroom for the platform's transcoding process, which can add intersample peaks that cause clipping if you're already maxed out at 0 dB.
Export format matters more than people think. Always export to WAV, 16-bit or 24-bit, 44.1 kHz for distribution. Not MP3. Not AAC. Lossless only. Every streaming platform transcodes your upload into multiple formats for different devices and connection speeds, and if you give them a compressed file to start with, they're compressing a compression, which sounds exactly as bad as it sounds. Start with the highest quality you can provide and let the platform handle the rest.
Frequently Asked Questions (FAQ)
What audio quality does Suno output by default? Suno gives you compressed MP3 files unless you're on a Pro plan, in which case you can download WAV. But the file format isn't the real problem — the audio itself has limitations. There's that frequency ceiling around 15 to 16 kHz, the compressed dynamic range, the artifacts baked into the generation. Converting an MP3 to WAV doesn't fix any of that. You need actual processing, not just a file format change.
Is Suno v4 audio quality better than v3? Yes, noticeably. V4 extends higher into the frequency range, the vocals sound less metallic, the bass has more definition, and the stereo imaging feels more natural. But it's still not professional-grade out of the box. You still get that 15 kHz ceiling, the compressed dynamics, the machine-perfect timing that feels lifeless. V4 gives you better raw material to work with, but post-processing is still necessary if you want it to sit next to real records.
Can I make Suno tracks sound professional without a DAW? Yes. Platforms like Undetectr and Neural Analog handle cleaning, mastering, and even automatic cleanup and finishing polish in one automated process. You upload the file, the system does its thing, you download a processed version. No DAW, no plugins, no EQ knowledge required. It's not as flexible as doing it yourself, but it's fast and it works. If you do use a DAW, combining your own mixing decisions with one of these AI tools gives you the best of both approaches.
What EQ settings work best for Suno tracks? Start with a cut around 200 to 500 Hz to remove mud, specifically targeting 400 Hz with a 3 to 5 dB reduction. Cut 2 to 6 kHz by 2 to 3 dB to tame harshness. Add a high-shelf boost above 12 kHz to restore air and presence. Mono everything below 80 Hz to fix phase issues in the bass. Use a high-pass filter at 35 or 90 Hz to remove subsonic rumble. These aren't magic numbers, they're starting points that work on most Suno generations. Adjust based on what your ears tell you.
How do I fix robotic or muffled AI vocals? Split the vocal stem from the rest of the track using a good stem separation tool. Run that isolated vocal through something like Adobe Podcast Enhance at around fifty percent intensity, or use a Remove Reverb model to strip out the digital ambiance. Apply de-essing to control sibilance. If you have access to AI vocal upscalers, those can add clarity without artifacts. The key is working on the vocal separately so you're not trying to fix it while also fixing drums, bass, and everything else at the same time.